🙂The Ultimate Parent's Guide to Printable Treasure Hunt Templates
Introduction
Creating magical moments for children doesn't have to be complicated or expensive. With printable treasure hunt templates, you can transform an ordinary afternoon into an unforgettable adventure. As a parent of three kids and someone who's organized countless treasure hunts over the past decade, I've learned that having the right templates - from mysterious maps to exciting clue cards and reward certificates - makes all the difference. This guide will walk you through everything you need to know about using treasure hunt printables to create engaging quests that'll get kids moving, thinking, and having a blast.
1: Getting Started with Treasure Hunt Templates
- Understanding the basics of printable treasure hunt materials
- Essential components: maps, clues, and certificates
- Age-appropriate template selection (4-6, 7-9, and 10-12 years)
- Basic supplies needed (printer, paper, optional lamination)
Treasure hunts are a fun and engaging way to encourage teamwork, problem-solving, and creativity, whether for a birthday party, team-building event, or educational activity. Using a treasure hunt template can simplify the process and make planning easier. Here’s a guide to help you get started with treasure hunt templates, ensuring an enjoyable experience for everyone involved! 🗺️🏴☠️
1. Choosing the Right Template
The first step is to select a template that suits your event's theme and audience. There are many options available, including:
-
Birthday Parties: Templates with age-appropriate clues and themes.
-
Educational Hunts: Focused on specific subjects or skills.
-
Corporate Events: Team-building themes that promote collaboration.
-
Holiday Themes: Templates tailored for festive occasions like Halloween or Christmas. 🎉
You can find templates online, or you can create your own by using a basic format and customizing it.
2. Understanding the Basics of a Treasure Hunt Template
A typical treasure hunt template will include:
-
Introduction: A brief description of the hunt, including its purpose and rules.
-
Clue List: A series of clues or riddles that lead participants from one location to the next.
-
Final Treasure Location: Where the hunt concludes, often with a prize or reward. 🎁
Sample Template Structure
3. Customizing Your Template
Once you have your basic template, it's time to personalize it! Here are some ideas:
-
Adjust the Difficulty: Modify the clues to suit the age group or skill level of your participants. Younger children might need simpler riddles, while adults may enjoy more complex challenges. 🧩
-
Incorporate Local Landmarks: Use recognizable places in your area to make the hunt more engaging. This also adds an element of exploration!
-
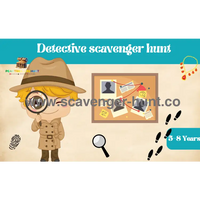
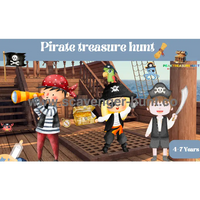
Add Fun Themes: Consider themes like pirates, detectives, or nature, and customize your clues accordingly.
-
Include Visual Aids: Incorporate images or maps for a more interactive experience. This can help visual learners and add excitement to the hunt. 🗺️
4. Preparing for the Hunt
Preparation is key to a successful treasure hunt. Here’s a checklist to help you get ready:
-
Print Copies of Your Template: Ensure you have enough for all participants.
-
Test the Clues: Walk through the hunt yourself to ensure all clues lead to the next location and that the difficulty level is appropriate.
-
Set Up Locations: If your hunt involves multiple locations, make sure each spot is accessible and ready for participants.
-
Gather Supplies: Collect any materials needed for the hunt, such as treasure boxes, markers, or props. 🎒
5. Hosting the Treasure Hunt
On the day of the event, follow these steps to ensure everything goes smoothly:
-
Gather Participants: Start with a brief introduction, explaining the rules and the importance of teamwork.
-
Distribute Materials: Hand out the printed templates and any other supplies participants will need.
-
Monitor the Hunt: Keep an eye on the participants to ensure they’re having fun and staying safe. Offer hints if they get stuck! 🤔
-
Celebrate the Winners: Once the treasure is found, celebrate all participants and reward the winners. You could provide small prizes or certificates!
Conclusion
Treasure hunts are a fantastic way to bring people together for an adventure filled with laughter and camaraderie. By using a treasure hunt template, you can streamline the planning process and create a memorable experience for all. Now that you're equipped with the knowledge to get started, gather your supplies and prepare for an exciting treasure hunt! Happy hunting! 🏆🌟
2: Creating Custom Treasure Maps
- Designing age-appropriate treasure maps
- Adding authentic-looking details
- Including landmarks and directions
- Tips for weathering paper for an aged look
- Digital vs. hand-drawn elements
Designing a custom treasure map can be one of the most exciting parts of organizing a treasure hunt! Whether you’re planning a birthday party, a team-building event, or an educational activity, a unique treasure map adds an extra layer of fun and adventure. Here’s a step-by-step guide to help you create an engaging and visually appealing treasure map. 🗺️✨
1. Conceptualizing Your Map
Before diving into the design, think about the overall theme and purpose of your treasure hunt. Consider the following aspects:
-
Theme: Is your treasure hunt pirate-themed, adventure-based, or perhaps linked to a specific story? The theme will guide your design choices.
-
Location: Will the map cover a specific area, like a park, your backyard, or even an indoor space? Knowing the layout will help you create an accurate map. 🌳🏡
-
Target Audience: Tailor your map’s complexity and style to the age group participating. For younger kids, a colorful and simple map will do wonders; for older participants, consider a more detailed and challenging design.
2. Gathering Materials
Once you have a concept in mind, gather the materials you’ll need to create your treasure map:
-
Paper: Choose sturdy paper, such as cardstock or thick craft paper, for durability.
-
Markers or Colored Pencils: Opt for bright colors to make the map visually appealing.
-
Ruler: To create straight lines and defined areas on your map.
-
Stickers or Stamps: To add fun elements and markers for significant locations. 🌟
-
Digital Tools (optional): If you prefer a digital approach, software like Adobe Illustrator or even simple apps like Canva can help you design a professional-looking map.
3. Sketching the Layout
Begin by sketching the layout of your map. Here’s how to do it:
-
Outline the Area: Draw the boundaries of your treasure hunt area, marking key locations like trees, buildings, paths, and other notable landmarks.
-
Scale and Proportions: Keep the scale in mind; try to maintain proportions so participants can easily navigate the map.
-
Add Symbols: Use symbols for various locations. For instance, a tree could be represented by a simple tree icon, while a treasure chest can mark the final destination. 🏴☠️
4. Adding Details
Once your layout is complete, it’s time to enhance your map with details:
-
Coloring: Use bright colors to differentiate various areas. For example, green for parks, blue for water bodies, and brown for trails. 🎨
-
Labels: Clearly label important locations. Use playful fonts or handwritten styles to match your theme.
-
Clues and Riddles: Integrate clues or riddles directly onto the map, guiding participants to their next location. For example, “Where the old oak tree stands, your next clue is in hand!” 🌳
-
Decorative Elements: Add decorative elements like compass roses, treasure icons, or even pirate ships to make the map more visually interesting.
5. Weatherproofing Your Map
If your treasure hunt will take place outdoors, consider weatherproofing your map to ensure it withstands the elements:
-
Laminating: Use a laminator to cover the map with a protective layer. This will prevent water damage and tearing.
-
Plastic Sleeves: If lamination isn’t an option, putting the map in a plastic sleeve can provide similar protection.
6. Final Touches
Before the big day, take a moment to add any final touches:
-
Test Run: Walk through the treasure hunt area to ensure your map is accurate and all locations are clear. Adjust any confusing areas as needed. 🏃♂️
-
Share the Map: If you have a digital version, consider sharing it with participants beforehand. This can build excitement and allow them to familiarize themselves with the layout.
Conclusion
Creating a custom treasure map is a fantastic way to engage participants and set the stage for an unforgettable adventure. With thoughtful planning and a touch of creativity, your treasure map will not only guide the treasure seekers but also enhance their overall experience. So gather your materials, unleash your creativity, and prepare for an exciting treasure hunt that will be remembered for years to come! 🗺️🪙
3: Crafting Engaging Clue Cards
- Writing age-appropriate riddles and clues
- Using pictures for younger children
- Incorporating educational elements
- Sequential vs. random clue placement
- Indoor and outdoor clue variations
Clue cards are the heart and soul of any treasure hunt. They guide participants from one location to the next while adding an element of excitement and intrigue. Crafting engaging clue cards is essential to keeping everyone motivated and involved throughout the adventure. In this chapter, we’ll explore how to create clue cards that are not only functional but also fun and engaging! 🕵️♂️✨
1. Understanding the Purpose of Clue Cards
Before you start crafting your clue cards, it’s crucial to understand their purpose. Clue cards should:
-
Guide Participants: Each card should lead participants to the next location or task in the treasure hunt.
-
Encourage Problem-Solving: Incorporate puzzles, riddles, or challenges to stimulate critical thinking.
-
Maintain Engagement: Use creative storytelling or themed clues to keep participants invested in the hunt.
2. Deciding on the Format
Clue cards can take various forms, depending on your treasure hunt’s theme and audience. Here are some popular formats to consider:
-
Riddles: Create clever riddles that hint at the next location or item. Riddles can be straightforward or complex, depending on your audience’s age and skill level.
-
Puzzles: Incorporate jigsaw puzzles or word searches that need to be solved to reveal the next clue. 🧩
-
Visual Clues: Use images or symbols that represent the next location, making the cards visually appealing.
-
Story Elements: Integrate a narrative that unfolds with each clue, adding depth and intrigue to the hunt.
3. Crafting the Clue Content
Now that you’ve chosen a format, it’s time to create the actual content of your clue cards. Here are some tips:
a. Keep It Clear and Concise
While creativity is essential, clarity is key. Make sure the clues are easy to understand, avoiding overly complicated language that could confuse participants.
b. Incorporate Themes
Align the clues with your treasure hunt’s theme. For example, if it’s a pirate-themed hunt, use nautical language and references to the sea. Here’s an example:
Clue Example: “To find the next piece of gold, go where the captain’s tales are told. Under the old oak tree, the treasure you will see!” 🌳🏴☠️
c. Create Varied Difficulty Levels
To keep things interesting, mix up the difficulty levels of the clues. Start with easier clues to build confidence, then gradually increase the challenge. This keeps participants engaged and allows everyone to contribute, regardless of their skill level.
4. Designing the Clue Cards
The design of your clue cards can enhance the overall experience. Here’s how to make them visually appealing:
-
Use Colorful Paper: Choose vibrant colors that match your theme or the season. You can also use patterned paper for added flair. 🎨
-
Add Illustrations: Hand-draw or use clip art to add fun illustrations that relate to the clues. This can be anything from treasure chests to maps or even characters from your theme.
-
Include Decorative Elements: Use stickers, stamps, or washi tape to embellish the edges of your clue cards, making them more attractive.
5. Testing Your Clue Cards
Before the treasure hunt, test your clue cards to ensure they work as intended:
-
Walk the Course: Go through the treasure hunt yourself, using the clue cards to navigate. This will help you identify any confusing clues or locations.
-
Get Feedback: If possible, have a friend or family member try out the clues. They can provide valuable feedback on the clarity and difficulty of the clues. 🤔
6. Organizing Your Clue Cards
Once your clue cards are crafted and tested, it’s important to keep them organized for the event. Here are some tips:
-
Number the Clue Cards: Clearly number each card in the order they should be used. This will help participants keep track of their progress.
-
Use Envelopes: Place each clue card in a separate envelope, labeling them with the location they belong to. This not only keeps them organized but also adds an element of surprise. ✉️
-
Create a Backup: Consider making an extra set of clue cards in case any get lost or damaged during the hunt.
Conclusion
Crafting engaging clue cards is an integral part of designing a successful treasure hunt. With creativity, thoughtful content, and appealing designs, your clue cards will not only guide participants but also enhance their overall experience. So gather your materials, unleash your creativity, and prepare for a treasure hunt filled with excitement, mystery, and fun! Happy hunting! 🗝️🏆
4: Making Special Certificates and Rewards
- Creating personalized achievement certificates
- Designing themed reward templates
- Adding special effects (gold seals, stamps)
- Incorporating photos and custom text
- Digital customization options
One of the most rewarding aspects of hosting a treasure hunt is the opportunity to recognize participants for their efforts and achievements. Special certificates and rewards can add an extra layer of excitement and motivation, making the experience memorable for everyone involved. In this chapter, we’ll explore how to create meaningful certificates and rewards that celebrate your treasure hunters’ accomplishments. 🎉🏆
1. The Importance of Certificates and Rewards
Certificates and rewards serve several important purposes:
-
Recognition: They acknowledge participants’ hard work and dedication, boosting their confidence and sense of achievement.
-
Memorable Keepsakes: Certificates and awards can serve as mementos, allowing participants to look back fondly on the experience.
-
Motivation: Offering rewards encourages participants to give their best effort during the treasure hunt. Everyone loves a little friendly competition! 🏅
2. Designing Certificates
Creating a special certificate is easier than you might think! Here’s how to craft a certificate that participants will be proud to display:
a. Choose a Theme
Align the design of your certificate with the overall theme of your treasure hunt. If you’re hosting a pirate-themed hunt, use nautical imagery, such as anchors, ships, and treasure maps. If it’s an adventure theme, consider using maps or jungle motifs. 🗺️⚓
b. Include Essential Elements
A well-designed certificate should contain the following components:
-
Title: Make it clear what the certificate is for, such as “Treasure Hunt Champion” or “Bravery Award.”
-
Participant’s Name: Personalize the certificate by including the participant’s name.
-
Date: Add the date of the event to commemorate the occasion.
-
Signature: Include your signature or that of the organizer to add authenticity.
c. Design Tips
-
Use Templates: There are many online templates available that you can customize to fit your theme. Websites like Canva or Adobe Spark offer user-friendly options.
-
Choose Colors Wisely: Select colors that are vibrant and appealing but also match your theme.
-
Add Graphics: Incorporate fun graphics, such as treasure chests, gold coins, or themed borders, to make the certificate visually engaging. 🎨
3. Crafting Unique Rewards
In addition to certificates, consider offering unique rewards that can enhance the excitement of your treasure hunt. Here are some ideas:
a. Fun Prizes
-
Treasure Chests: Small boxes filled with goodies like candy, toys, or trinkets. You could decorate these boxes to match the treasure theme.
-
Custom Medals: Create or purchase medals that align with the theme, such as gold medals for champions or silver medals for participation. 🥇
-
Themed Merchandise: Consider giving away items related to your treasure hunt theme, like pirate eye patches, adventure books, or compass keychains.
b. Experience-Based Rewards
Instead of physical items, you could offer experience-based rewards, which can be equally valuable:
-
Certificates for Future Events: Provide winners with free entry to future events or treasure hunts.
-
Group Activities: Offer a fun group activity, such as a picnic, game night, or movie outing, to celebrate everyone’s participation.
-
Special Recognition: Consider creating a "Hall of Fame" display or a shout-out on social media to recognize participants’ achievements publicly. 📸
4. Presentation Matters
The way you present certificates and rewards can enhance the overall experience. Here’s how to make it special:
-
Ceremony: Host a small award ceremony at the end of the treasure hunt. Gather everyone together, read out the achievements, and present the certificates and rewards with enthusiasm. This creates a sense of occasion and excitement! 🎊
-
Personal Touch: When handing out certificates, take a moment to recognize each participant’s contributions. A personal touch can make the experience even more memorable.
-
Display Options: Consider framing the certificates or placing them in decorative folders for an added touch of class.
5. Planning for Inclusivity
Make sure that all participants feel recognized and valued:
-
Participation Certificates: Provide certificates for all participants, celebrating their involvement regardless of their performance.
-
Special Awards: Consider creating categories for unique awards, such as “Best Team Spirit,” “Most Creative Thinker,” or “Best Problem Solver.” This ensures that everyone has a chance to receive recognition. 🌈
Conclusion
Creating special certificates and rewards is a fantastic way to acknowledge the efforts of participants in a treasure hunt. By taking the time to design meaningful certificates and offering fun rewards, you can enhance the overall experience, making it more memorable and enjoyable for everyone involved. So get creative, celebrate achievements, and prepare for a treasure hunt that participants will remember long after the adventure ends! 🎉🗝️🏅
5: Implementation Tips and Tricks
- Setting up the perfect hunt route
- Safety considerations for different ages
- Indoor vs. outdoor hunt planning
- Group vs. individual hunt modifications
- Seasonal and themed hunt ideas
Successfully implementing a treasure hunt involves careful planning and execution. To ensure your event runs smoothly and everyone has a fantastic time, here are some valuable tips and tricks that cover various aspects of organizing your treasure hunt. From preparation to execution, these insights will help you create a memorable experience for all participants! 🎯🏴☠️
1. Planning Ahead
a. Start Early
Begin planning your treasure hunt well in advance to allow ample time for all preparations. Starting early helps you avoid last-minute stress and lets you fine-tune every detail. Aim for at least a few weeks of planning, especially if you have a large group.
b. Create a Timeline
Develop a timeline outlining all the tasks that need to be completed leading up to the event. This could include creating clues, designing certificates, setting up the treasure map, and organizing supplies. A clear timeline will keep you organized and on track. 📅
2. Choose the Right Location
a. Scout the Area
Select a location that is safe, accessible, and suitable for the age group participating. Take time to scout the area and identify potential hazards, obstacles, or challenging terrain.
b. Consider Accessibility
Ensure that the location is accessible for all participants, including those with mobility challenges. If the treasure hunt involves multiple locations, make sure they are within a reasonable distance from one another.
c. Create a Safe Environment
Before the event, walk through the area to ensure it’s safe and free from any potential hazards, like steep cliffs, busy roads, or thorny bushes. Prioritize participants' safety to ensure everyone can enjoy the hunt without worry. 🚧
3. Preparing Clues and Materials
a. Test Your Clues
Before the event, conduct a test run of your clues to ensure they lead participants effectively from one location to the next. Walk through the hunt yourself, or enlist a friend to help test the clues for clarity and difficulty.
b. Use Clear Instructions
Make sure your clue cards and instructions are clear and easy to understand. Avoid overly complicated language or ambiguous wording that could confuse participants. You want everyone to feel engaged, not frustrated! 🧐
c. Organize Supplies
Gather all necessary supplies ahead of time, including clue cards, treasure maps, certificates, and any additional materials. Organize these items so that they’re easy to access on the day of the event. A well-prepared host is a confident host!
4. Engaging Participants
a. Set the Mood
Consider how you can create an immersive experience for participants. Decorate the starting area to match your theme, play themed music, or even dress up to get everyone excited! The more engaged you are as a host, the more excited participants will be. 🎶
b. Encourage Teamwork
Treasure hunts are a fantastic way to promote teamwork. Encourage participants to work together, share ideas, and communicate as they solve clues. This not only enhances the experience but also fosters a sense of camaraderie.
c. Offer Hints Sparingly
If participants get stuck on a clue, provide hints, but do so sparingly to maintain the challenge. You want participants to feel accomplished when they solve each clue, but offering a little help can keep things moving smoothly.
5. Managing the Event
a. Be Flexible
No matter how much planning you do, be prepared for unexpected changes. Whether it’s a sudden change in weather or a last-minute participant drop-out, maintaining flexibility will help you adapt and keep the event running smoothly. 🌦️
b. Monitor the Action
Keep an eye on participants as they navigate the treasure hunt. Offer encouragement, ensure they’re safe, and be available for any questions or clarifications they may have. Your presence will reassure participants and keep the energy high!
c. Capture the Moment
Consider designating someone to take photos or videos during the treasure hunt. Capturing moments of excitement and teamwork will create lasting memories for everyone involved. You can later share these with participants as a fun reminder of their adventure! 📸
6. Wrapping Up
a. Celebrate Achievements
At the end of the treasure hunt, gather everyone together for a celebration. Hand out certificates, recognize participants' achievements, and share highlights from the event. This recognition creates a positive atmosphere and allows everyone to bask in their success.
b. Gather Feedback
After the event, ask participants for their feedback. This can help you understand what worked well and what could be improved for future treasure hunts. Listening to participants will also make them feel valued and included.
c. Reflect and Plan for the Future
Take some time to reflect on the event. What went well? What challenges did you face? Use these insights to improve your planning and execution for future treasure hunts, ensuring that each event is even better than the last! ✨
Conclusion
Implementing a successful treasure hunt requires careful planning, organization, and engagement. By following these tips and tricks, you can create an exciting and memorable adventure for participants of all ages. Remember, the goal is to have fun and foster teamwork, creativity, and problem-solving skills. So gather your supplies, unleash your imagination, and get ready for an unforgettable treasure hunt experience! 🗺️🏆
Frequently Asked Questions
Q: How long should a treasure hunt last for different age groups?
A: For ages 4-6: 15-20 minutes For ages 7-9: 20-30 minutes For ages 10-12: 30-45 minutes
Q: How many clues should I include in my treasure hunt?
A: A good rule of thumb is:
- Ages 4-6: 5-7 clues
- Ages 7-9: 8-12 clues
- Ages 10-12: 12-15 clues
Q: Can I reuse treasure hunt templates?
A: Absolutely! Consider laminating your printable templates for multiple uses and varying the hiding spots and final treasure to keep things fresh.
Q: What kind of prizes work best for treasure hunts?
A: Consider age-appropriate rewards like:
- Small toys or stickers
- Special privileges
- Adventure-themed books
- Small denominations of money
- Healthy treats or snacks
Q: How can I make treasure hunts educational?
A: Incorporate grade-appropriate:
- Math problems
- Spelling challenges
- History facts
- Science riddles
- Geography clues
Conclusion
Printable treasure hunt templates are more than just paper games - they're gateways to imagination, learning, and family bonding. By using these templates creatively and adapting them to your children's ages and interests, you can create countless adventures right in your own home or backyard. Remember, the most memorable hunts aren't always the most elaborate - they're the ones filled with excitement, discovery, and shared joy. So print out those templates, hide those clues, and watch as ordinary moments transform into extraordinary memories.
Discover our Complete Scavenger Hunts Collection.
